

Hi everybody! Today I'm doing a how-to on the most adorable (and unique) mugs EVER! Me and my friend Nikki, found the idea on pinterest and decided to try it out. It was most definitely a success. So, if you would like to try it out, read on!

Materials:
- Nail Polish.. preferably bright and colorful!
- Toothpicks (not 100% necessary but helpful)
- Plain white mugs - different shapes & sizes are fun!
- A old container filled with warm water.. Make sure you don't mind the container getting dirty.
Step One:
Pour a few drops of nail polish into the tub. All the mugs I made were two-toned, so once the first set of drops spread out in the water, I splashed another set of drops randomly on top of it.

This... Is what is looked like after the second set of drops.

Step Two:
Dip your mug into the water where the color is. Make sure you do this very quickly after you put the drops in the water, otherwise the nail polish will dry and it won't work. Make sure when you dip the mug that all of the parts that you want colored are covered in water. If you want to coat all sides of the mug, you can turn the mug within the water, but again, make sure you act fast!


Step Three:
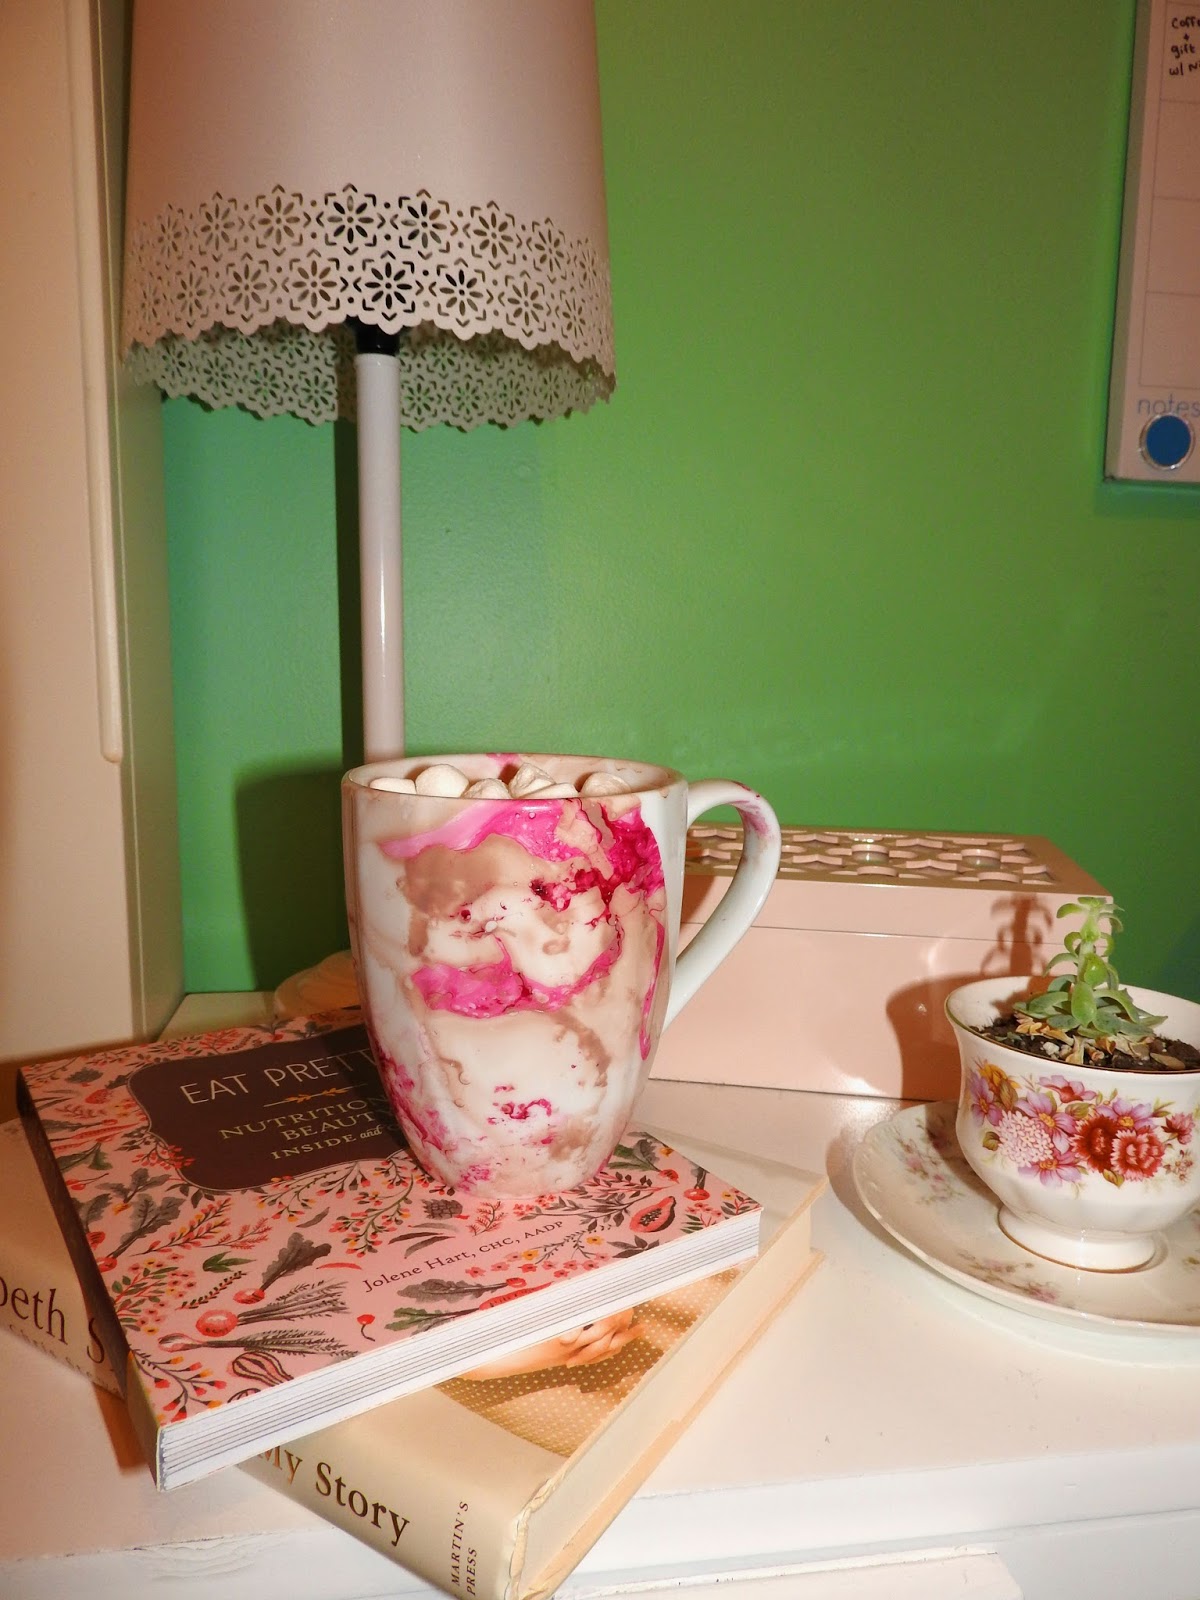
Take your mug out of the water and marvel at the results! My favorite thing about these mugs is that each one is SO different from the next. And they're all so beautiful!


A Few Things to Remember...
- Do not dip your mug BACK in the nail polish after you've taken it out, it could ruin the coloring.
- When you do take the mug out, you may have to dab it with a paper towel to get clumps of color/large droplets of water off the mug.
- The toothpicks can be used to swirl around the polish within the water and make designs.
Annnd.... The final product!
Thanks For Reading!
xx, Adrienne
No comments:
Post a Comment